Showing posts with label tutorial. Show all posts

July 15, 2010

Paint Mixology

Paint.
We all love paint.
Paint is the power to change.

That's why when I came across Loris' Paint Mixology tutorial from Frugal Farmhouse Design, I knew I wanted to share it with you. She used this simple technique on an old farm table. Look how great it turned out! Click here for all the details.


May 2, 2010

window seat taa-daa!

Confession:  I lost the 'before' picture for this project.

I swear I took the pic.  But where is it?
I've search through the endless piles of photo chaos on my computer.  Oh, don't judge me.  You know the photo chaos...you've been lost in it too. 
The abyss of unmarked photos scattered all over your computer.  

Promise: I promise to save my pictures in a marked and uber-organized way.  At lease until I'm in a hurry or the cheese quesadillas are burning...

Craigslist rules!  I found a photo similar to the coffee table I originally bought.
My coffee table cost me $10 bucks.  But, I needed a window seat!  
I was looking something with modern lines and a neutral feel.

TAA-DAA!!


This was an easy project with some basic upholstery. 

Step #1: Prep and paint the wood frame.
After removing the lovely smoke mirrored glass, I painted the table and then sanded up the edges a bit to let the dark wood show through.

Step #2: Cut some wood board to replace the glass mirrors. 

Step #3: Cut a piece of foam for the bench seat.  The best way to cut foam is a band saw.  But if you don't have one, the second best way is with a sereded kitchen knife.
Glue the foam to the board using spray adhesive.


Step #4: Using a staple gun, cover the foam with a liner cloth. 
Securely staple on the backside of the board.  Use a firm even pressure around the edges.  As you can see in the picture, I use my body weight to push foam in and then staple the fabric.  This makes a nice rounded edge on your seat. 


Step #5: Cover your seat with the upholstery fabric.
Using the same technique as the liner cloth, use a firm even pressure and staple the fabric in place.  Always cut away and excess fabric.  Pull your corners in and staple them like crazy. Remember, the underside of your project doesn't have to look perfect.  This is not an art of perfection...and that's why I love it!  Also, I'm using an air powered staple gun, which is the bomb.  If you don't have access to one of these, a hand powered gun is great.  I've done many many project with a hand gun.
Step #6: Staple your trim.
Adding a trim gives finished look to your project.  Here I choose a burlap natural fiber that fit in with my neutral scheme.  Simply, staple the trim along the edge of your board. 
 
Here's a trick I learned from a great upholsterer, when the two ends of your trim meet, simply unravel the ends, cross them over each other and staple in place on the underside of the board. This way your cushion will fit perfectly without the added bulk of the extra trim.


 Step #7: Put your bench together.
Add a few L brackets to secure your seat.

That's it!
Enjoy your bench!


April 27, 2010

Rock n Roll 2

 Many of you have contacted us asking about the details of our little red porch rockers.
You asked...and here it is.

Click here for the original Rock-n-Roll post.
I ask one thing in return...please email me the before and after pictures of your rocker remodel.  I'd love to see all your great ideas post them here on Peppertowne.
Click here to email me your pictures.

Tip, Tricks & a mini-Tutorial
I'm sorry I don't have pictures of the process.

Step #1
Prepare and paint your wood. 
I cut out the lattice cane and the other seat & back material.  If you have a cane seat, leave the ribbon of caning the surrounds the circumference of the seat frame that held the lattice cane in place. The wood on the rockers we found was trashed but with a light sanding and a few coats of red spray paint made a big difference.

Step #2
Create a new seat and back.
Get a thin piece of wood.  We used 1/4 inch MDF but anything will do.  First cut a pattern out of paper or scrap fabic for your seat and back.  Make the pattern slightly bigger than the hole for your seat and back.  This will help when it's time to attach them to the rocker. 
Next trace the pattern onto your wood and cut it to shape.

Step #3
Upholster your seat and back. 
I stapled a thick batting to the top of the seat and back.  Then stapled a lining and then the outdoor upholstery fabric to the top of the seat, trimming away excess and making a tight fit.  Next, cut a piece of upholstery fabric to cover the under side of the seat and back cushion.  Fold the ends of the fabric over and staple tighlty.  You can glue a cute trim around your seam to create a finished look especially if the underside of your rocker will show.

Step #4
Attach the seat and back cushion.
This is much more simple than it seems.  Remember when you cut your board to be a bit larger than the seat and back hole?  Now you can rest the finished cushon on the seat and it will sit on top of the wood of the rocker.  Make sure it fits and position the seat, then add a string of wood glue on the circumference where your cushion and the seat frame meet.  To secure the bond between your rocker
and your cushion add a few L brackets.

That's it!
Do you have other questions?  Send me a quick note, I'm happy to help.
And don't forget to send me your before and after photos!

April 25, 2010

Back in Time

This little garden bench is ho-hum. 
I don't love it.
Saturday a friend took me to a little shop that featured 
heavily weathered and worn pieces.
I was inspired!
I dragged the bench into my shop and began to work.
Now, I love it!!


Do you want to make a drop down for your link parties.
Click here for Amy's great tutorial.
-----

And, some of you have asked, "How did you do this?"

It's simple. 

Step #1:  Paint your furniture piece.  Paint layers of different colors.  On this bench I painted it white and then blue.  A friend and I were coming up with ideas for an old black table she has.  She wants to make create this severly weathered, worn and distressed look with layers of paint.  So, were going to paint a layer of pink and then a layer of white...I can't wait to see how this project turns out.

Step #2: Get out your can of paint stripper.  The same stuff Amy used on this beachy dresser remodel.  Randomly brush the stripper over your painted piece of furniture.  Once the stripper begins to crinkle the paint scrape it off in big and little chunks revealing the different colors below.  I was even able to strip down to the bare wood in some spots which gave this a great organic feel. 

Step #3: Use a stain to 'dirty up' the paint job.  I used a dark walnut.  Using a rag, wipe the stain on and let it sit for a few minutes then wipe it off.  Repeat if you want a dirtier look.
Then you can seal your project with a satin clear coat.

And that's it!
Good luck.  And send us any photos of before and afters of your project!

If you have any other questions about this project, email us here.


March 14, 2010

Vintage Stool Remodel

Look what's been sitting in my workshop gathering dust! 
My Man found these vintage bar stools at a storage shed auction when we were first married and I loved them from the beginning.
 Now they get a long overdue remodel.
This project is easy and takes about 2 hours to complete both stools.

Tools & Supplies
Screwdriver * Pliers * Staple Gun and Staples * Hammer and Mallet * Glue Gun * Drill * Chocolate Snack * Batting * Upholstery Fabric and Trim * Lining Fabric * Knitting Needle * Upholstery Needle * Upholstery Twine *Button Making Kit
------
Before
These bar stools just need a little love.  The upholstery is old and worn but the pedestal is gorgeous!  It's naturally aged and a beautiful creamy gold color.  When you're doing your own stool, you can easily paint and age the pedestals to coordinate with your new upholstery.
Step One
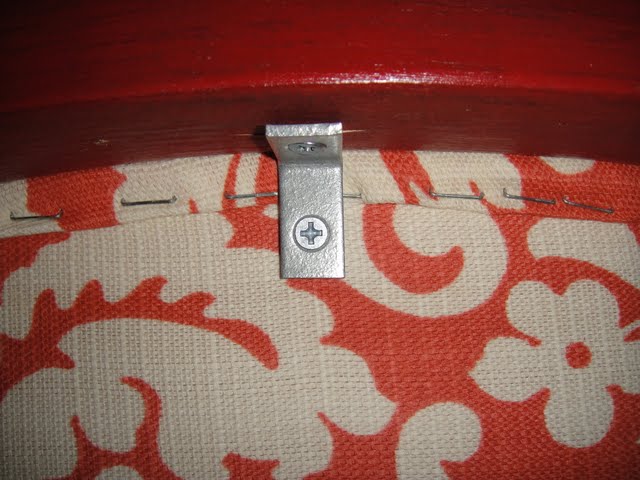
Remove the pedestal from the seat cushion. 

Using the pliers and screwdriver, take out all the staples and remove the original upholstery. 

This upholstery was a lovely gold pleather!  The bar stools were made by a company called ChroModern.  I did a little internet research but couldn't find much about these vintage stools.  If you know anything about ChroModern, send me an email.  I'd love to learn a little history.
Step Two
Drill a button hole in the center of the wood backing.  I use the largest size drill bit in my Man's workshop. 
Next, eyeball and cut the amount of batting you will need.  The original seat cushin is a little weak and very old school, so I've added a thick layer of batting. 

Then, staple the edges of your batting to the wood one edge at a time,  Use a firm hand and pull the batting evenly and smoothly across the seat.  I will usually do a few staples on one side and then a few on the opposite side to ensure an even form.  Until I've stapled all around the circle.

Cut away the excess batting. When covering a circle the edges will naturally pucker.  Cut the pucker away as in picture 4-5.  You want to create an even smooth form.
 Step Three
Using your eye for judgement, cut the amount of liner fabric you will need.  Liner fabric isn't any special kind of fabric.  I mostly use scraps from my fabric bin but even and old sheet will do fine.  The purpose is to help control the cushioning (the batting, the foam etc) and create a uniform shape to upholster.  Always pull firmly and evenly to avoid creating an uneven shape.

When upholstering a cirlce shape, the best way to staple is to grab a fistful of fabric and stapling the gathers that naturally appear.  Then move to the opposite side and repeat until the liner has be securly stapled.   This is a perfect time to practice how you will staple the outside uphostery.  And remember,  if something doesn't look right, simply remove a staple or two and redo it. 

Next cut away any excess fabric outside your stapled area.  And waaalaaa!  A nice smooth circle shape. 

Step Four
You can use any button you want to tuft a furniture piece but this time I'm going to make covered buttons for this project.  This is also a great time for a little chocolate snack...I love the Almond Clusters! 
To begin, simply purchase a button covering kit at your local fabric store and follow the simple directions.  But in general, this is how button making works.  I use a soft mallet for step 5 to ensure my button is fitted well.
Step Five
Thread your buttons.  Fold your upholstery twine in half to creat a loop.  Thread the loop through the eye of the button. Insert the loose end of the twine through the loop and pull tight. 

Step Six
Center the cushion upside down on the wrong side of the fabric.  Make sure you have enough fabric to staple up the sides.  And trim away any excess fabric.  It will only get in your way.

Next, using a knitting needle, push through the back side of the cushion to the front making sure you are centered.  Pull the needle in and out a few times creating a path for your upholstery needle.
Third, thread your upholstery needle with you button and twine.  Then push the needle through the cushion pulling your twine as tightly as you like.  The tighter you pull, the deeper the button tuft. 
 Adhere the twine to the back board with a few staples. And then tie a knot.
Step Seven
Turn your cushion right side up and begin to pull and straighten the fabric till it's smooth.  Begin at the button and pull outward.

Next, staple the fabric to the backboard.  With this circle I like to use the same method for stapling the liner fabric.  Grap and fist full of upholstery and pull tightly, evenly and firmly.  Ahere with a few staples.  Move to the opposite side and do the same.  Grabbing and pulling and stapling all the puckers tightly.  After you've stapled the round, cut away the excess fabric. 

I should add a backing to this chair but I didn't feel like it.  To do this, staple a piece of fabric tightly across the back and finish the edge with hot glue and ribbon.

Put the pieces back together.  Attach the cushion to the base.
Step Eight
Finally make it yours!  Add  a trim.  I picked this flirty little pom pom.  Using hot glue or fabric glue attach your trim.
Une Belle!
Now you're finished.  Enjoy your sweet little bar stool.

If you have a before and after project you'd like to feature on Peppertowne, email a low resolution before and after picture here.

Related Posts Plugin for WordPress, Blogger...