
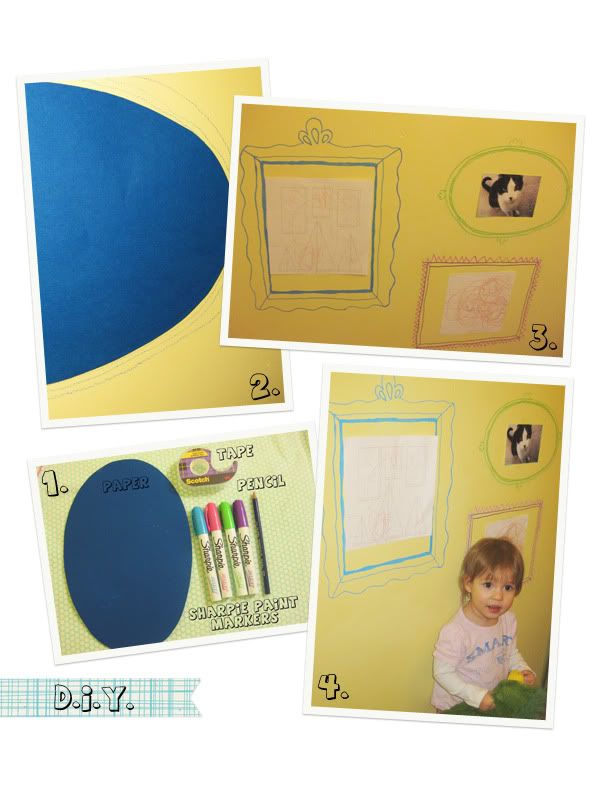
2. Draw your frames first in pencil, this will give you an outline to trace with the paint markers, but will easily wash off when you're finished.
3. Pick a color and paint away. Don't worry about straight lines, those little inconsistencies make it look special and unique. The wavier the better. The paint will dry within a few minutes and then you can wash off those pencil marks. I made the mistake of using a colored pencil (not so easy to wash off) so I would recommend a regular graphite pencil.
4. Let your little one show off their artwork!
-Amy
--Linking up to--
Remodelaholic
Fingerprints on the Fridge
Kojo designs
Tip me Tuesday
Polly want a crafter
Between naps on the porch
The girl creative
No comments:
Post a Comment